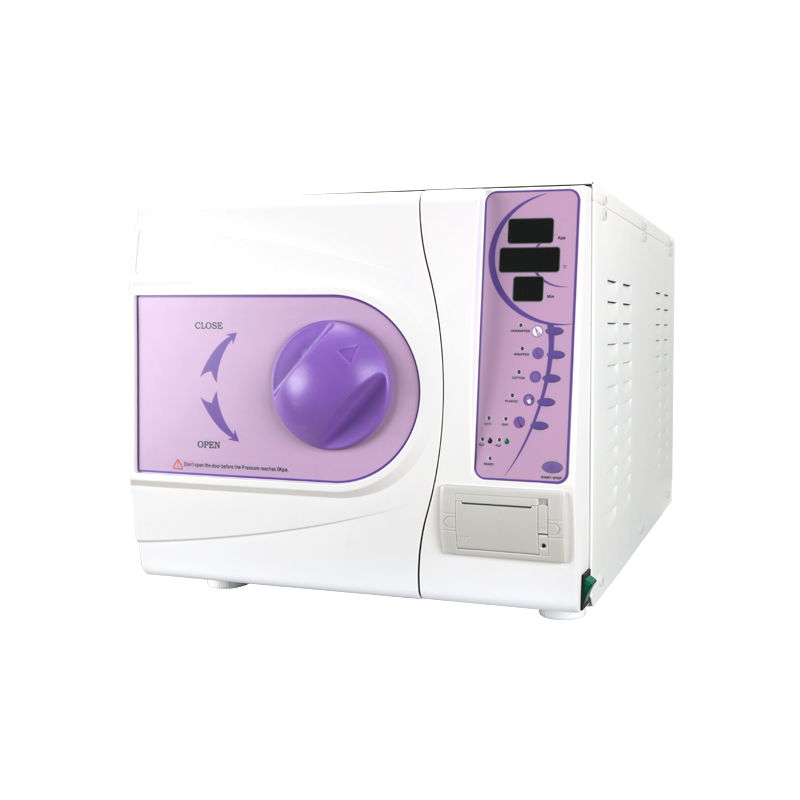
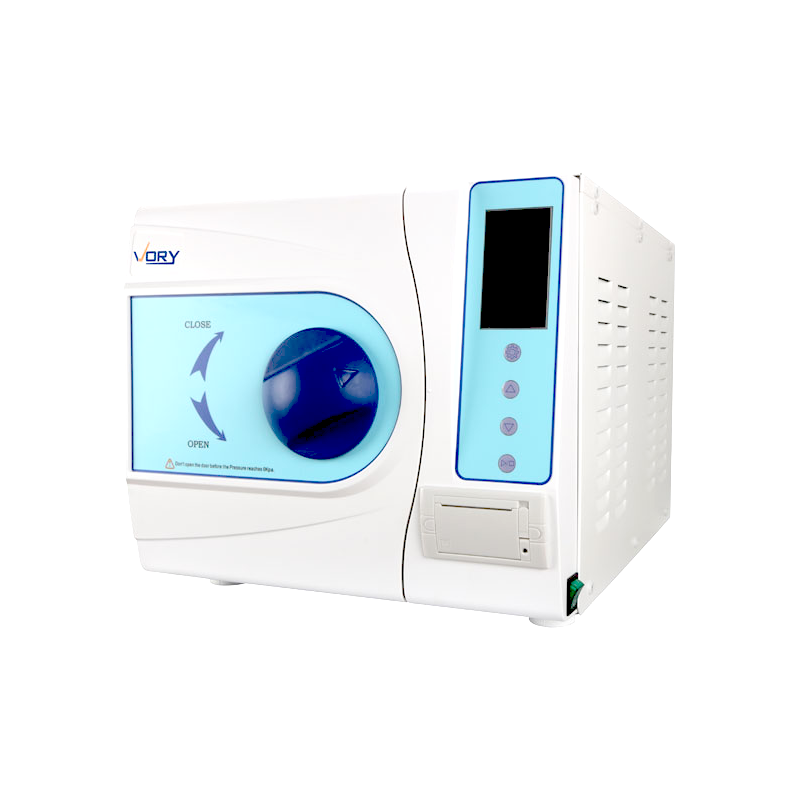
86-15728040705

Industry News

Home / News / Industry News / Autoclave Dental Instruments: Complete Guide to Sterilization

Autoclave Dental Instruments: Complete Guide to Sterilization

Content

Dental Sterilization Guide

A dental autoclave uses high-pressure saturated steam — typically at 134°C and 2.1 bar — to destroy all forms of microbial life on reusable dental instruments, including heat-resistant bacterial spores. This makes steam sterilization the gold-standard method recommended by the CDC and WHO for infection control in every dental practice.

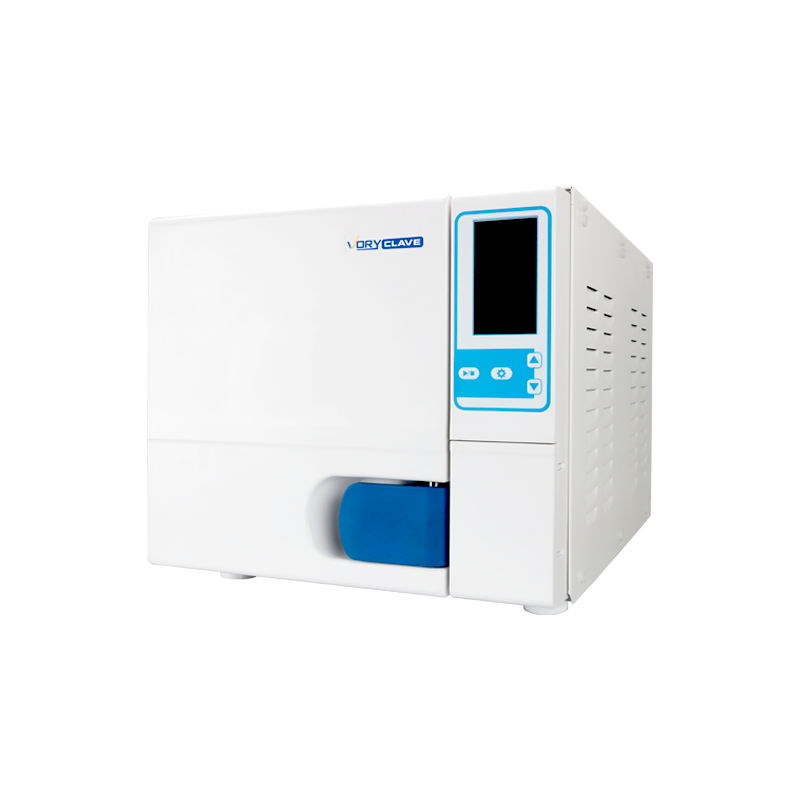
What a Dental Autoclave Actually Does to Your Instruments

When dental instruments move from one patient to the next without proper sterilization, they can carry pathogens such as Staphylococcus aureus, hepatitis B virus, HIV, and prion proteins responsible for conditions like Creutzfeldt–Jakob disease. A properly maintained dental autoclave eliminates that risk by combining three physical parameters: elevated temperature, pressurized steam, and timed exposure.

During a standard cycle, the autoclave chamber is first evacuated to remove air pockets that would otherwise insulate instruments from steam. Pressurized steam then floods the chamber, driving the temperature above what boiling water alone can achieve at normal atmospheric pressure. At 134°C, the dwell time needed to achieve a Sterility Assurance Level (SAL) of 10⁻⁶ — meaning fewer than one chance in a million of a viable organism surviving — is as short as 3 minutes. At the lower 121°C setting used for heat-sensitive loads, the required dwell time rises to approximately 15 minutes.

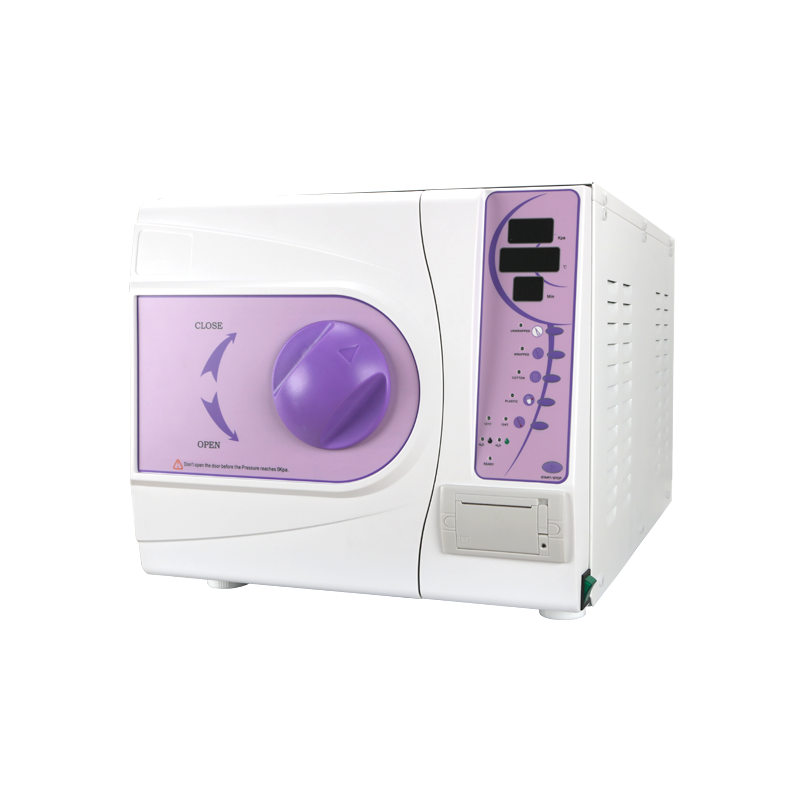
After sterilization, the chamber undergoes one or more vacuum drying phases. This step is critical: instruments stored while damp can sustain microbial growth inside the sealed pouch, undermining every minute of the autoclave cycle. Modern Class B dental autoclaves use fractional pre-vacuum (up to three vacuum pulses) to ensure steam penetration into narrow lumens and hollow handpieces, while the final drying phase wicks residual moisture before the door unseals.

!

Autoclaves achieve a log-6 reduction in microbial load when loaded correctly, maintained on schedule, and validated with biological indicators containing Geobacillus stearothermophilus spores — the most autoclave-resistant organism used in standard testing.

Types of Dental Autoclave: Class N, Class S, and Class B Compared

Not every dental autoclave performs the same type of sterilization cycle. The European standard EN 13060 categorizes small steam sterilizers into three classes, and selecting the wrong class for your instrument mix is one of the most common compliance errors in dental practices.

Class N

Gravity Displacement (Naked/Solid)

Relies on steam displacing air by gravity. Effective only for solid, unwrapped instruments with no lumens or cavities. Cannot sterilize pouched loads or hollow items reliably. Cycle time is typically 20–30 minutes at 121°C. Suitable for simple, solid metal instruments in a quick-turnaround setup, but not suitable for wrapped packs or handpiece channels.

Class S

Specified Loads Only

Designed for a specific, manufacturer-defined range of loads, which may include porous items or single-wrapped instruments. Performance is validated only for those specified loads. More versatile than Class N but less capable than Class B. Check the manufacturer documentation carefully before using pouched or hollow instruments.

Class B

Fractional Pre-Vacuum (All Loads)

The highest standard for dental practices. Uses multiple vacuum pulses before and after sterilization to ensure complete air removal, full steam penetration, and effective drying. Validated for all instrument types: solid, hollow, porous, single-wrapped, and double-wrapped. A Class B dental autoclave is the required choice for any practice sterilizing handpieces, endodontic files, or surgical instruments in sealed pouches.

EN 13060 autoclave classification summary for dental practices
Class Solid Unwrapped Wrapped / Pouched Hollow (Handpieces) Porous Textiles Typical Cycle (134°C)
N Yes No No No 20–30 min
S Yes Specified only Specified only Specified only 15–25 min
B Yes Yes Yes Yes 10–18 min

The Complete Sterilization Workflow: From Chairside to Sterile Storage

Running a dental autoclave is only one part of a multi-step decontamination process. Skipping or shortcutting any earlier stage can make the autoclave cycle itself ineffective. Below is the full validated workflow that infection control guidelines — including those published by the CDC's Guidelines for Infection Control in Dental Health-Care Settings — recommend for all reusable dental instruments.

01

Chairside Containment

Immediately after use, place contaminated instruments into a color-coded container with a lid. Do not rinse or wipe at chairside — this creates aerosols and splash risk. Transport sealed to the central sterilization area.

02

Mechanical Cleaning

Use an ultrasonic cleaner or washer-disinfector rather than hand scrubbing wherever possible. Ultrasonic cleaning at 40–50 kHz removes debris from grooves and box-locks that brushing misses. Studies show manual cleaning can leave up to 84% of protein residue on complex instruments. Residual organic material creates a biofilm barrier that physically blocks steam from contacting metal surfaces, rendering the autoclave cycle unreliable.

03

Inspection and Maintenance

After cleaning, inspect each instrument under magnification for visible soil, corrosion, and functional integrity. Apply instrument lubricant to hinged instruments before sterilization to prevent rust and ensure smooth function post-cycle. Damaged instruments should be removed from service: a cracked pouch seal or bent instrument tip is a contamination risk.

04

Packaging

Place cleaned instruments in self-sealing sterilization pouches or wrapped cassette systems. Write or print the load number, date, and autoclave cycle number on each pouch. Double-pouch implantable devices. Packaging must be designed specifically for steam autoclave use — not all pouch materials tolerate repeated 134°C cycles.

05

Loading the Dental Autoclave

Do not overload the chamber. Load pouches on edge or paper-side-down, with enough space between items for steam to circulate freely. Overloading is one of the most frequently cited causes of sterilization failures in dental audit inspections. Most manufacturers recommend filling no more than 75% of the usable chamber volume.

06

Cycle Selection and Running

Select the correct program for the load type: 134°C/3-minute for standard metal instruments, 121°C for any heat-sensitive items within tolerances, and manufacturer-specific programs for dental handpieces if applicable. Never interrupt a cycle in progress.

07

Post-Cycle Verification

Review the cycle printout or digital log to confirm that temperature, pressure, and time all reached and held target values. Check that Class 1 process indicators on each pouch have changed color. Do not release instruments for use if any parameter fell outside the validated range.

08

Drying, Cooling, and Storage

Allow the autoclave to complete its drying phase before opening the door. If pouches are damp on removal, this indicates a drying failure — do not use these instruments; re-clean, re-pouch, and re-sterilize. Store sterile-packaged instruments in a clean, closed drawer or cabinet away from humidity and traffic. Shelf life is event-related, not time-limited: a sealed, intact pouch stored correctly remains sterile indefinitely until the packaging is compromised.

Which Dental Instruments Go in the Autoclave — and Which Do Not

Not every item in a dental operatory is compatible with steam sterilization at high pressure and temperature. Using the wrong sterilization method for an instrument can damage it or — more critically — fail to achieve sterility.

Autoclave-Compatible Instruments

  • Stainless steel handpieces (with manufacturer-approved lubrication program)
  • Forceps, elevators, and extraction instruments
  • Scalers, curettes, and periodontal probes
  • Endodontic files and reamers (stainless steel)
  • Metal impression trays
  • Surgical burs (stainless steel and carbide)
  • Amalgam condensers and carvers
  • Mouth mirrors with autoclavable handles
  • Cassettes and instrument trays (stainless steel)
  • Orthodontic pliers (stainless steel, standard models)

Not Suitable for Steam Autoclave

  • Fiber-optic handpieces (unless explicitly rated for steam sterilization)
  • NiTi (nickel-titanium) rotary files — autoclave can degrade NiTi metallurgy; follow manufacturer guidance carefully
  • Rubber dam punches with rubber components
  • Photopolymerization curing lights (most models)
  • Intraoral cameras and sensors
  • Plastic handles and instruments with acrylic components
  • Aluminum impression trays (risk of corrosion and dimensional distortion)
  • Items with electronic components
  • Heat-sensitive materials exceeding 135°C tolerances

For items that cannot tolerate moist heat, alternative methods include ethylene oxide (EtO) gas sterilization, hydrogen peroxide plasma (Sterrad), or high-level chemical disinfection — but these methods require separate validated equipment and are substantially slower than a dental autoclave cycle.

Autoclave Validation and Monitoring: Biological, Chemical, and Mechanical Testing

Owning a dental autoclave does not guarantee sterility — only a structured monitoring and validation program does. Regulatory bodies worldwide, including the CDC, the UK's HTM 01-05, and Australian Standard AS/NZS 4815, all require three parallel monitoring systems.

Biological Indicators (BIs)

The only direct proof of sterilization. BIs contain a known quantity of Geobacillus stearothermophilus spores (D-value tested). Run BIs at least weekly and with every implantable device load. A positive BI result after a completed cycle means quarantine of all instruments from that period and immediate autoclave servicing.

Self-contained BIs provide results within 24–48 hours. Rapid-readout BIs using enzyme fluorescence can deliver results in 1–3 hours — critical for practices with high implant volume.

Chemical Indicators (CIs)

Color-change strips or labels that react to temperature, steam presence, or time. There are six CI classes under ISO 11140-1. Class 1 indicators (external process indicators printed on pouches) confirm only that the item went through a sterilization process. Class 5 integrating indicators and Class 6 emulating indicators provide the highest chemical monitoring assurance, changing only when all three critical parameters — time, temperature, and steam — have been met.

Use a Class 5 or 6 CI inside every pouch, not just on the outside. External indicators are visible without opening; internal indicators verify conditions at the instrument surface.

Mechanical (Physical) Monitoring

Review the autoclave's built-in gauges, digital displays, and cycle printout after every single load. Confirm time at temperature, chamber pressure, and drying phase duration all match the validated cycle parameters. Most modern dental autoclaves log this data electronically; retain records for a minimum of 3 years as required by most regulatory frameworks.

Bowie-Dick or air removal tests should be performed daily on Class B autoclaves to verify effective air removal before the first sterilization load of the day.

Maintaining Your Dental Autoclave: A Practical Service Schedule

A dental autoclave that passes weekly biological indicator testing but has a clogged chamber drain or failing door gasket is an instrument failure waiting to happen. Preventive maintenance is not optional — it is the reason the monitoring system works. Below is the maintenance schedule used in high-throughput dental practices to keep downtime and compliance failures at near zero.

Recommended dental autoclave maintenance schedule by frequency
Frequency Task Purpose
Every cycle Review cycle printout; check door seal visually Catch parameter deviations immediately
Daily Bowie-Dick / air removal test (Class B); clean chamber interior with damp cloth; check water reservoir level and quality Confirm air removal efficacy; prevent mineral scale and biofilm
Weekly Run biological indicator test; clean chamber door gasket; inspect pouch loading procedure Verify sterility assurance; maintain door seal integrity
Monthly Descale chamber and reservoir with manufacturer-approved descaler; check and tighten all fittings; test safety valve function Prevent mineral fouling that reduces heat transfer and blocks steam
6-monthly / Annual Full service by qualified engineer; replace door gasket (recommended annually); recalibrate temperature and pressure sensors; re-validate cycle parameters Maintain regulatory compliance; extend service life (typical autoclave lifespan: 8–12 years with proper maintenance)

Water quality is one of the most overlooked factors in autoclave longevity. Only use distilled or deionized water in the autoclave reservoir — never tap water, even in areas with "soft" water. Tap water contains dissolved minerals that deposit as scale on heating elements and chamber walls, reducing efficiency by up to 30% over 12 months and eventually causing element failure. A reverse osmosis unit or a ready supply of pharmaceutical-grade distilled water (conductivity below 5 µS/cm) is the recommended standard.

Choosing a Dental Autoclave: Key Specifications That Actually Matter

The dental autoclave market ranges from compact bench-top units with 6-litre chambers to large floor-standing models with 23-litre capacity. The right choice depends on patient volume, instrument turnaround needs, and the types of instruments being sterilized. Here are the specifications that should drive the purchasing decision.

Chamber Volume

A single-surgery dental practice with moderate throughput typically manages with a 17–22 litre Class B unit. High-volume practices or those running multiple surgeries simultaneously should consider 23+ litre models or two separate units to avoid instrument bottlenecks. Never rely on a single autoclave without contingency for servicing downtime.

Cycle Speed

Modern Class B dental autoclaves complete a full sterilize-and-dry cycle in 15–20 minutes at 134°C. Some manufacturers advertise rapid cycles as short as 12 minutes, though drying quality at this speed should be validated before routine use. Compare total cycle time (from door close to end-of-cycle signal), not just dwell time at temperature.

Data Logging and Connectivity

Modern dental autoclaves should include USB, Wi-Fi, or Ethernet logging to a practice management system. Printed paper rolls degrade and can be lost; digital logs are retrievable years later for compliance audits. Some regulatory bodies — including HTM 01-05 in England — now specify that electronic records are the preferred format.

EN 13060 Certification

Verify the unit carries an independently certified CE mark with reference to EN 13060 Class B (for European markets) or an equivalent national standard. Manufacturer claims alone are insufficient — request the test certificate. For practices in the USA, look for FDA 510(k) clearance.

Drying Performance

Inadequate drying is the leading cause of wet pack failures in dental practices. Evaluate the manufacturer's published drying data — instruments should exit the cycle with no visible moisture on pouches. Models with a combined vacuum drying and hot-air purge stage generally outperform those with vacuum-only drying at equivalent cycle times.

Service and Parts Availability

A dental autoclave with excellent specifications but a 2-week lead time for replacement parts creates practice disruption that negates any technical advantage. Before purchasing, confirm the manufacturer or distributor has a local engineer network, same-day or next-day call-out options, and holds critical spare parts (door gaskets, heating elements, filters) in regional stock.

Regulatory Standards and Compliance Requirements for Dental Autoclave Use

Operating a dental autoclave is not simply a matter of plugging in a machine and pressing start. Dental practices in every major market operate under binding infection control regulations that specify how autoclaves must be used, validated, and documented.

United States

The CDC's Guidelines for Infection Control in Dental Health-Care Settings — 2003 (updated with subsequent infection control guidance) specifies steam sterilization as the preferred method for heat-tolerant dental instruments. OSHA's Bloodborne Pathogens Standard (29 CFR 1910.1030) mandates written exposure control plans that include instrument sterilization protocols. State dental boards may impose additional requirements — check your state's specific dental practice act.

United Kingdom

Health Technical Memorandum HTM 01-05 (Decontamination in Primary Care Dental Practices) classifies dental practices into "essential quality requirements" and "best practice" tiers. All dental practices in England must meet the essential quality requirements, which include using a Class B autoclave for wrapped instruments, maintaining a full validation record, and completing Portable Appliance Testing (PAT) annually. The Care Quality Commission (CQC) inspects against these standards.

European Union

The EU Medical Devices Regulation (MDR 2017/745) governs the manufacture and placing on the market of dental autoclaves. EN 13060 defines performance requirements for small steam sterilizers. ISO 17665-1 specifies validation and routine control requirements for moist heat sterilization processes in healthcare. National competent authorities (e.g., BfArM in Germany, ANSM in France) may impose additional local requirements.

Australia / New Zealand

AS/NZS 4815:2006 (Office-Based Health Care Facilities — Reprocessing of Reusable Medical and Surgical Instruments and Equipment) is the relevant standard. It requires quarterly performance qualification testing, daily biological monitoring for implantable device loads, and traceable documentation of every autoclave cycle. The Australian Dental Association (ADA) publishes supplementary infection control guidelines aligned with this standard.

Across all markets, the direction of regulatory travel is toward more documentation, digital record-keeping, and shorter validation intervals — not less. Investing in a dental autoclave with built-in compliance logging now avoids a costly retrofit or replacement in the next 3–5 years.

Common Autoclave Failures in Dental Practices — and How to Prevent Them

Even a correctly specified Class B dental autoclave can fail to deliver sterility if operated or maintained incorrectly. The following failure modes appear repeatedly in dental infection control audits and equipment service reports.

01

Wet Packs After the Cycle

Cause: Overloaded chamber, incorrect loading orientation, compromised door seal, or failed drying phase. Wet packaging destroys the sterile barrier — moisture allows capillary transfer of microorganisms through pouch material.
Prevention: Load pouches on-edge, never flat-stacked; confirm drying cycle is active in selected program; replace door gasket at least annually.

02

Positive Biological Indicator Result

Cause: Cycle parameter failure (insufficient temperature or time), inadequate air removal, heavily soiled instruments, or failing heating element.
Prevention: Pre-clean all instruments rigorously; run daily Bowie-Dick tests; schedule annual engineer validation. On a positive BI result: quarantine all loads since the last negative BI, investigate root cause before returning autoclave to service.

03

Scale Build-Up and Element Failure

Cause: Use of tap water in reservoir. Even a 1 mm scale deposit on a heating element reduces thermal efficiency by approximately 10%.
Prevention: Use only distilled or deionized water; descale monthly with an approved product; replace the water reservoir filter as per manufacturer schedule.

04

Corrosion on Instruments After Autoclaving

Cause: Instruments not dried completely after ultrasonic cleaning before bagging; dissimilar metals in the same cassette (galvanic corrosion); failure to use instrument lubricant on hinged items; poor water quality.
Prevention: Dry instruments after cleaning before pouching; keep carbon steel and stainless instruments separate; lubricate hinged instruments before sterilization; use only instrument-grade lubricant (not WD-40 or mineral oil).

05

Door Seal Failure

Cause: Gradual wear and thermal degradation of the silicone door gasket. This typically causes pressure leaks, extended cycle times, or cycle abort errors.
Prevention: Inspect the gasket weekly for cracks, deformation, or debris; clean with a damp cloth only (no solvents); replace annually as a preventive measure regardless of visible condition.

06

Missing or Incomplete Cycle Records

Cause: Paper roll exhausted in printer; staff not trained on logging protocol; reliance on memory rather than a documented system.
Prevention: Implement an electronic logging system; assign a named staff member as sterilization coordinator; include autoclave record review in monthly practice audits.

The Role of Dental Autoclave Accessories and Consumables

The performance of a dental autoclave depends significantly on the consumables used with it. Using non-validated accessories is a compliance risk and can compromise the integrity of sterilized instrument packs.

  • Sterilization pouches: Must be rated for the maximum autoclave temperature in use (usually 134°C / 273°F). Look for pouches meeting ISO 11607-1 and EN 868-5. Use pouches with both external Class 1 and internal Class 5/6 chemical indicators. Replace immediately if a seal is incomplete, paper layer is torn, or film is punctured.
  • Wrapping paper and non-woven wrap: Used for cassettes and larger instrument sets. Must be medical-grade (EN 868-2/3 compliant) and designed for steam permeability. Standard paper or kitchen foil are not acceptable substitutes.
  • Cassette systems: Stainless steel instrument cassettes reduce pouch use, minimize instrument handling, and improve loading consistency. They require a compatible autoclave rack and validated drying times, which are typically longer than individual pouches due to the cassette mass.
  • Biological indicator ampoules: Match the BI brand and lot number to the autoclave cycle being validated. Store BIs at the manufacturer-specified temperature (typically 2–8°C) and use before the expiry date. A BI used outside storage conditions cannot be relied on.
  • Distilled water: Purchase pharmaceutical-grade or produce on-site via reverse osmosis. Conductivity should be below 5 µS/cm. Test with a conductivity meter periodically — reverse osmosis membranes degrade over time and output quality can deteriorate without visible signs.
  • Instrument lubricant: Use only water-soluble, instrument-grade lubricant specifically formulated for autoclave use. Oil-based lubricants coat instruments with a film that can block steam penetration. Apply after cleaning and before pouching, not after sterilization.

Frequently Asked Questions About Autoclaving Dental Instruments

How long do dental instruments stay sterile after autoclaving?

Sterilized instruments in an intact sealed pouch remain sterile indefinitely under correct storage conditions. Sterility is event-related, not time-related: a pouch stored in a clean closed drawer with no physical damage, moisture, or temperature extremes does not become unsterile simply because time has passed. Any event that compromises the pouch — tearing, wetting, puncture, exposure to humidity — ends sterility regardless of how recently the autoclave cycle was run. Many practices stamp a "use by" date on pouches as an audit trail prompt rather than a true sterility expiry.

Can dental handpieces be autoclaved?

Yes, but only with specific conditions. All modern dental turbines and contra-angle handpieces should be sterilized between patients using an autoclave. Before sterilization, handpieces must be cleaned by running air and water through the internal channels (using a lubrication and cleaning device), and then lubricated using the manufacturer-specified oil. Only Class B autoclaves can reliably sterilize hollow loads like handpieces. Never use a Class N autoclave for handpieces. Check the handpiece manufacturer's instructions for the maximum number of sterilization cycles and the compatible autoclave temperature range.

How often should dental autoclave validation be performed?

Biological indicator testing should be performed at minimum once per week and with every load containing implantable devices. Full performance qualification (PQ) — where the autoclave cycle is re-validated against its original acceptance criteria using calibrated instruments — should be completed at least annually or after any major repair, relocation, or modification to the unit. In high-throughput practices, some regulatory guidance recommends quarterly PQ testing.

What temperature does a dental autoclave reach?

Standard dental autoclave cycles operate at either 121°C (250°F) with 103 kPa overpressure for heat-sensitive loads, or 134°C (273°F) with 206 kPa overpressure for standard metal instruments. These temperatures are achievable only in a pressurized chamber — water boils at 100°C at atmospheric pressure; the added pressure raises the boiling point to 121°C or 134°C respectively, ensuring steam rather than water vapor fills the chamber.

Is a dental autoclave the same as a sterilizer?

In everyday dental practice language, "autoclave" and "steam sterilizer" are used interchangeably. Technically, an autoclave is a pressurized vessel, and a sterilizer is a device that achieves sterility — but in the dental context, all bench-top steam sterilizers used for instrument reprocessing are pressurized autoclaves. Dry heat sterilizers, ethylene oxide chambers, and hydrogen peroxide plasma systems are also sterilizers, but they are not autoclaves.

Please Feel Free To Contact Us

If you have any question for the installation
or need support, please feel free to contact us.

86-15728040705
86-18957491906

86-15728040705
86-18957491906