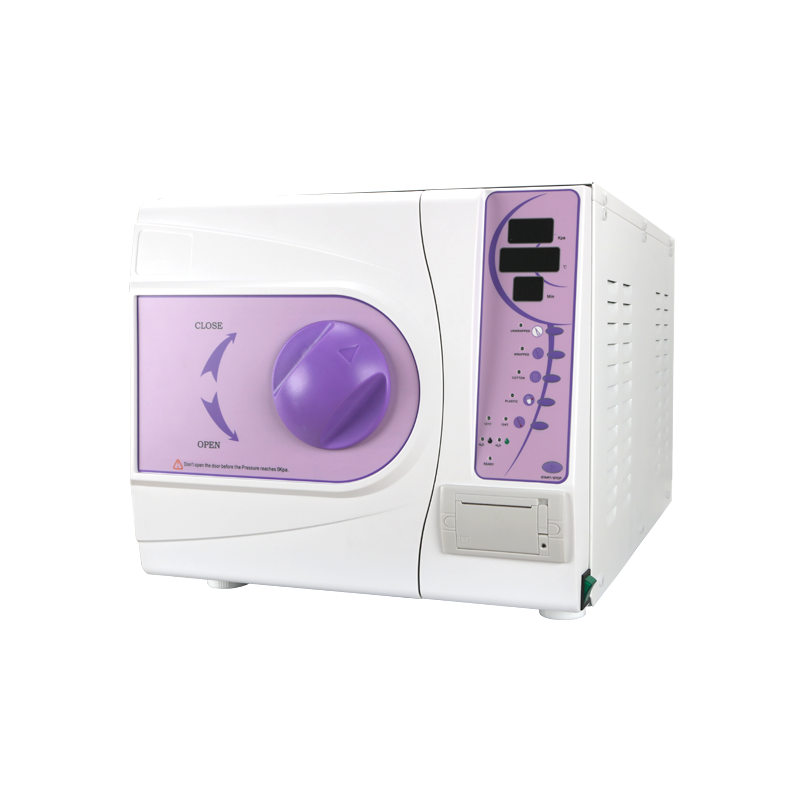
Main Autoclave Sterilisation Cycles: Gravity, Pre-Vacuum, and Flash
Different loads require different cycle types. Choosing the wrong cycle is a common cause of sub-optimal sterilisation, particularly with wrapped, lumened, or porous instruments. Below is a structured comparison of the most widely used cycles in medical, dental, and laboratory environments.
Table 1 — Standard autoclave sterilisation cycle parameters and typical applications
| Cycle Type |
Temperature |
Dwell Time |
Air Removal |
Best For |
| Gravity Displacement |
121°C (250°F) |
15–30 min |
Steam pushes air down/out through drain |
Unwrapped metal tools, glassware, liquids |
| Pre-Vacuum (B/S Class) |
134°C (273°F) |
3–10 min |
Vacuum pump evacuates air before steam |
Wrapped packs, pouches, porous loads, hollow instruments |
| Steam-Flush Pressure-Pulse |
132–134°C |
3–10 min |
Repeated steam flushes displace air |
Medical devices without deep lumens |
| Flash / IUSS |
132–134°C |
3–10 min (unwrapped) |
Gravity or pre-vacuum |
Emergency instrument retrieval only — not routine use |
| Liquid Cycle |
121°C |
20–40 min |
Slow exhaust to prevent boil-over |
Culture media, pharmaceutical solutions |
For dental and medical facilities that routinely sterilise wrapped instrument packs inside sterilization pouches, the pre-vacuum Class B cycle is the standard of care recommended by the European Standard EN 13060 and widely adopted globally. The pre-vacuum cycle ensures that steam penetrates deeply into the folds and layers of packaging material, including paper-film sterilization pouches, where gravity displacement alone would leave trapped air pockets.
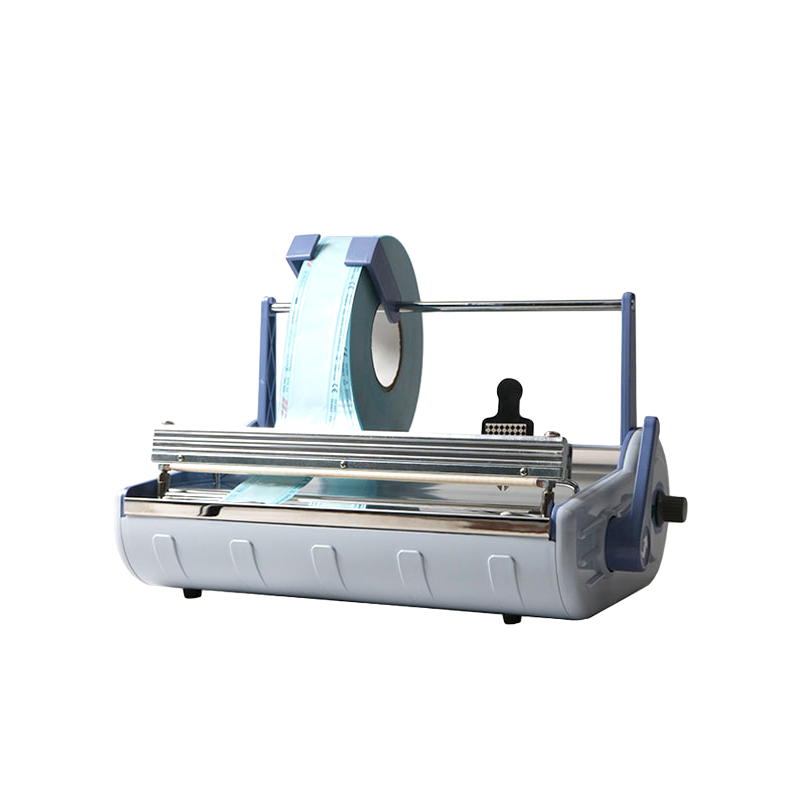
The Critical Role of Sterilization Pouches and the Sterilization Pouch Sealing Machine
Packaging is inseparable from the sterilisation process autoclave outcome. An instrument that has been perfectly sterilised but placed in a defective or poorly sealed pouch becomes a contamination risk the moment it leaves the autoclave. This is why infection control guidelines, including ANSI/AAMI ST79 in North America and EN ISO 11607 internationally, dedicate substantial sections to packaging performance and seal integrity.
What Are Sterilization Pouches?
Sterilization pouches — also called peel pouches or steri-pouches — are flat packaging units constructed from a combination of medical-grade paper on one side and transparent plastic film on the other. The paper side allows steam to pass through freely during the sterilisation cycle while acting as a microbial barrier during storage. The plastic film side provides a transparent window for visual inspection of instruments without opening the pouch. Most pouches incorporate chemical indicator ink printed directly on the outer surface; the ink changes colour when exposed to steam at the required temperature, providing a visible process indicator at a glance.
Pouches are available in standard sizes ranging from approximately 57 mm × 135 mm for small dental burs and endodontic files up to 305 mm × 457 mm for larger surgical sets. High-quality pouches are produced from materials that meet EN 868 (packaging for terminally sterilised medical devices) and ISO 11607-1 standards.
Self-Sealing vs Heat-Sealing: Choosing the Right Approach
Sterilization pouches come in two main closure types: self-sealing (pressure-sensitive adhesive strips) and heat-seal (requiring a dedicated sterilization pouch sealing machine). Each has clear advantages and limitations that directly affect both workflow efficiency and sterility maintenance.
Self-sealing pouches feature an integrated adhesive strip protected by a peel-off liner. The user removes the liner, folds the flap over, and presses firmly. These are popular for low-volume settings — tattoo studios, small dental practices, nail salons — because they require no equipment purchase. The drawback is that adhesive seal strength varies considerably between manufacturers, and aggressive autoclave cycles (particularly pre-vacuum at 134°C with high humidity) can challenge adhesive bonds.
A sterilization pouch sealing machine — also called a dental sealing machine or medical heat sealer — uses controlled heat and pressure to weld the open end of a reel-cut or pre-formed pouch shut with a continuous, consistent bond. Heat-sealed closures generally produce a stronger, more reliable seal than self-adhesive alternatives, which is why EN ISO 11607-2 explicitly validates heat sealing processes as part of packaging system validation. Modern sterilization pouch sealing machines feature:
- Digital temperature control (typically 130°C–200°C depending on film thickness and material composition)
- Adjustable sealing width (most units produce a seal band of 8–12 mm, consistent with ISO minimum seal width requirements)
- Continuous or pulse sealing modes to accommodate different pouch materials
- Integrated chemical or colour-change indicators embedded in the sealing strip
- Compact countertop footprint suitable for dental operatories and central sterile supply departments (CSSD)
For high-volume clinical environments processing more than 50–100 pouched instrument sets per day, a quality sterilization pouch sealing machine pays for itself rapidly through reduced packaging consumable waste and eliminated seal failures. Seal failures discovered post-sterilisation require the entire instrument set to be reprocessed — a significant cost in both time and materials.
Seal Integrity Testing: Why It Cannot Be Skipped
A sealed pouch that looks intact can still fail a peel test or burst test. EN ISO 11607-2 and ASTM F88 outline standardised methods for verifying seal strength. In routine clinical practice, operators perform a simple manual peel test on a representative sample from each sealing batch: the seal should peel cleanly and evenly without tearing the paper or delaminating the film. A ragged peel, paper fibre transfer to the film side, or a cold seal (partial, weak bond) are all rejection criteria. Any sterilization pouch sealing machine that cannot maintain consistent seal quality across an operating day — including as the heating element ages — should be recalibrated or replaced.
Step-by-Step Sterilisation Process Autoclave: From Dirty to Sterile
A complete sterilisation process autoclave workflow covers far more than the machine's operating cycle. Every step in the chain — from initial decontamination through final storage — contributes to the outcome. Below is a detailed walkthrough of the full workflow used in compliant medical and dental facilities.
01
Point-of-Use Decontamination
Immediately after clinical use, instruments should be wiped of gross soil and placed in a holding solution or transport container. Allowing blood, saliva, or tissue to dry onto instrument surfaces makes subsequent cleaning significantly more difficult. Studies from the British Dental Association show that allowing instruments to air-dry for more than 15 minutes before soaking can increase cleaning time by over 40%.
02
Manual or Ultrasonic Cleaning
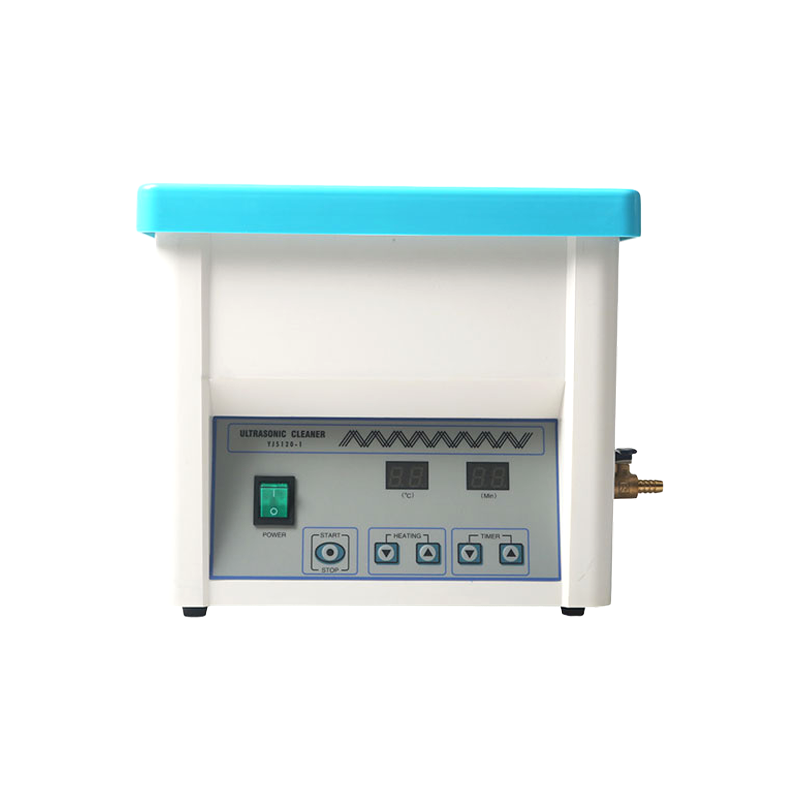
Instruments are cleaned either by hand scrubbing with a long-handled brush and enzymatic detergent, or more effectively, by ultrasonic cleaning. Ultrasonic cleaners generate cavitation bubbles at 20–40 kHz that reach into joints, serrations, and box locks that brushes cannot access. A standard ultrasonic cycle runs 3–10 minutes. Cleaning is the most critical step — no sterilisation process, autoclave or otherwise, can render a visibly soiled instrument sterile.
03
Rinsing and Inspection
Instruments are thoroughly rinsed with deionised water to remove detergent residue, then inspected under magnification or illumination for residual soil, corrosion, and mechanical function. Hinged instruments should open and close smoothly; sharps should have no nicks or burrs. Items that fail inspection are removed from the sterilisation workflow for repair or disposal.
04
Drying
Instruments must be thoroughly dried before packaging. Residual water introduced into the autoclave chamber alongside the load can interfere with steam quality and result in wet packs. Drying is typically accomplished using a drying cabinet at 70°C or with lint-free medical-grade towels.
05
Packaging and Sealing with a Sterilization Pouch Sealing Machine
Instruments are placed into appropriately sized sterilization pouches with the instrument tip pointing toward the paper side (this protects the film from puncture during handling). Hinged instruments are placed in the open position to allow steam penetration. The open end is then sealed using either the self-seal strip or a sterilization pouch sealing machine set to the correct temperature for the pouch material. Each pouch should be labelled with the autoclave load number, cycle date, and operator ID for traceability.
06
Loading the Autoclave
Pouches are loaded into the chamber on perforated trays with paper-side facing down (toward the drain) for gravity autoclaves, or paper-side up in pre-vacuum units — follow manufacturer guidance for your specific machine. Pouches should not touch each other or the chamber walls, and the chamber should never be overloaded. Overloading is one of the top three reasons for sterilisation cycle failures identified in hospital sterile processing audits.
07
Cycle Selection and Running
Select the appropriate sterilisation process autoclave cycle for the load type. Pre-vacuum cycles at 134°C for 3.5–4 minutes are standard for wrapped dental and surgical instrument packs. Gravity cycles at 121°C for 20–30 minutes are appropriate for unwrapped solid metal instruments and glassware. The machine automatically manages temperature, pressure, and timing. Modern autoclaves provide a printed or digital cycle record at the end of each run.
08
Post-Cycle Verification
When the cycle completes, check the print record for correct temperature and time. Inspect the chemical indicators on each pouch — they should have changed to the appropriate colour. Pouches must be completely dry; a wet pack indicates a drying failure and the entire load must be reprocessed. Allow pouches to cool on a clean, dry surface for at least 30 minutes before handling or storage.
09
Biological Indicator Testing
For robust sterilisation process autoclave quality assurance, biological indicators (BIs) containing Geobacillus stearothermophilus spores should be run through the autoclave at least weekly, and with every implantable device load. The CDC and AAMI recommend weekly BI testing as a minimum standard. After the cycle, BIs are incubated at 56°C for 24–48 hours in a dedicated incubator and examined for colour change indicating organism growth — or its absence, confirming sterilisation success.
10
Storage and Shelf Life Management
Sterile pouches should be stored in a clean, dry, climate-controlled environment away from direct sunlight, dust, and excessive humidity. Current evidence-based guidelines (AAMI ST79, CDC) define sterility as event-related rather than time-related — meaning a properly sealed, undamaged pouch stored under appropriate conditions remains sterile indefinitely unless a compromising event occurs (tear, puncture, wet storage surface, opened seal). Date labels facilitate first-in, first-out (FIFO) stock rotation.
Temperature, Pressure, and Time Parameters: A Practical Reference
Getting the sterilisation parameters right is not optional — it is what separates a validated, repeatable process from guesswork. The following table consolidates the parameters most commonly referenced across international standards and clinical guidelines including ANSI/AAMI ST79, EN 13060 (Class S/B/N autoclave classifications), WHO sterilisation guidelines, and CDC infection control recommendations.
Table 2 — Autoclave sterilisation parameters by load type (Sources: AAMI ST79, CDC, EN 13060)
| Load Type |
Recommended Cycle |
Temperature |
Pressure (above atm) |
Minimum Dwell |
| Unwrapped solid metal instruments |
Gravity |
121°C (250°F) |
15 psi / 103 kPa |
20 min |
| Wrapped dental / surgical packs in sterilization pouches |
Pre-Vacuum (Class B) |
134°C (273°F) |
30 psi / 207 kPa |
3.5–4 min |
| Porous loads (textiles, drapes) |
Pre-Vacuum |
134°C |
30 psi / 207 kPa |
4–5 min |
| Laboratory glassware and media |
Gravity |
121°C |
15 psi / 103 kPa |
20–30 min |
| Liquid media and pharmaceutical solutions |
Liquid (slow exhaust) |
121°C |
15 psi / 103 kPa |
20–40 min |
| Implantable devices |
Pre-Vacuum with BI included |
134°C |
30 psi / 207 kPa |
4 min + BI hold |
It is worth emphasising that the dwell times above represent minimum validated exposure — they do not include heat-up, conditioning, or drying time. The total cycle time from door-close to door-open for a typical pre-vacuum wrapped pack cycle is approximately 30–45 minutes on most modern Class B tabletop autoclaves. Planning autoclave throughput based on dwell time alone leads to serious workflow miscalculations in busy dental and surgical practices.
What Can and Cannot Be Processed Through the Sterilisation Process Autoclave
Not every item belongs in an autoclave. Understanding material compatibility is essential to prevent instrument damage, packaging failure, and equipment contamination. The following breakdown covers the most common clinical and laboratory materials.
Items Suitable for Autoclave Sterilisation
- Stainless steel surgical and dental instruments (forceps, scalers, probes, scissors, needle holders)
- Borosilicate glassware (beakers, flasks, test tubes, pipettes)
- Natural rubber products rated for steam sterilisation
- Woven and non-woven surgical drapes and textiles
- Microbiological media and aqueous solutions (liquid cycle)
- Polypropylene (PP) and polytetrafluoroethylene (PTFE) laboratory consumables rated for autoclave use
- Sterilization pouches (paper-film or Tyvek-film) and medical packaging rolls
- Cassettes, trays, and instrument organiser inserts made from anodised aluminium or surgical-grade steel
- Biohazardous waste designated for autoclave decontamination prior to disposal
Items That Must Not Be Autoclaved
- Heat-sensitive plastics such as polystyrene (PS), polyvinyl chloride (PVC), and low-density polyethylene (LDPE) — these melt, deform, or outgas toxic fumes
- Electronic components, battery-powered instruments, fibre-optic cables, and motorised handpieces not specified as autoclavable
- Flammable solvents, volatile chemicals, or any container under positive pressure
- Radioactive or cytotoxic materials without specific facility protocols
- Carbon steel instruments without stainless steel designation — prone to severe corrosion damage under steam
- Sealed containers that could pressurise and rupture inside the chamber
- Heat-sensitive prions — Creutzfeldt-Jakob Disease (CJD) prions require extended exposure at 134°C for 18 minutes minimum under specific protocols per WHO guidelines, and standard cycles are not sufficient
When in doubt, the instrument or material manufacturer's Instructions for Use (IFU) takes precedence over any general guideline. IFU documents specify validated reprocessing parameters and are legally binding documentation for manufacturers.
Autoclave Sterilisation Across Industries: Dental, Medical, Laboratory, and Beyond
Dental Practices
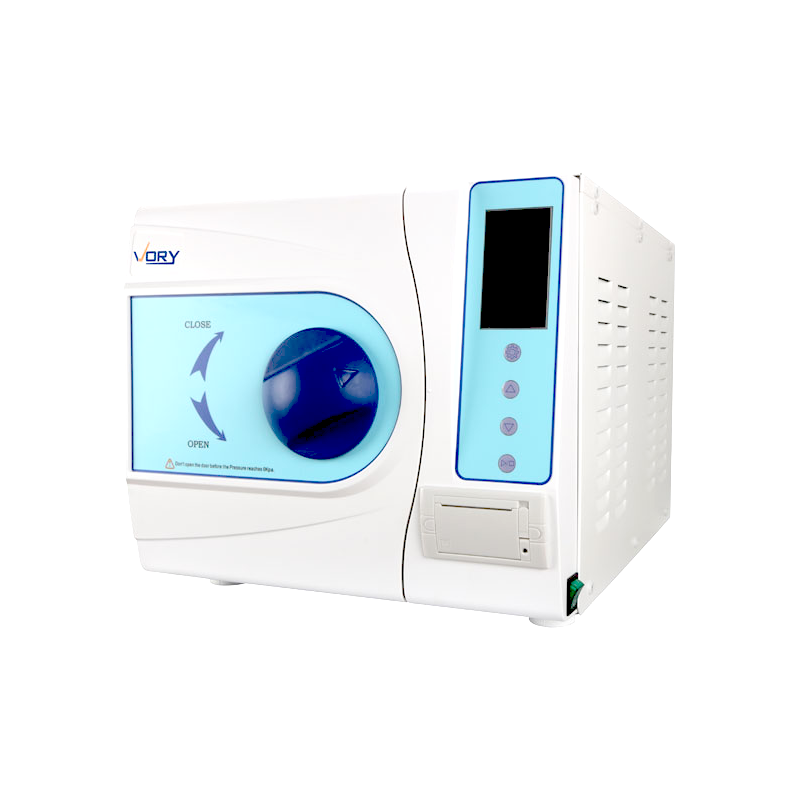
Dental clinics generate a high volume of reusable instruments per treatment session — a single oral examination can involve 8–12 instruments, and restorative procedures routinely use 20 or more. With appointment schedules running back-to-back, throughput of the sterilisation process autoclave directly affects clinic capacity. Most dental practices use tabletop Class B pre-vacuum autoclaves with chambers of 17–23 litres capacity. Instruments are packaged individually or in procedure-specific kits inside sterilization pouches sealed by a bench-top sterilization pouch sealing machine. Dual-parameter chemical indicators (responding to both temperature and time) are used on every pouch, and weekly biological indicator testing is standard practice recommended by the British Dental Association and American Dental Association.
Hospitals and Surgical Suites
Hospital Central Sterile Supply Departments (CSSD) process thousands of instrument sets daily using large floor-standing autoclaves with chamber volumes from 300 litres to over 2,000 litres. These facilities rely on validated batch records, barcode traceability systems, and automated cycle print records for every load. Instrument sets wrapped in rigid sterilisation containers or in multi-layer surgical wrap reach the autoclave in quantities that would overwhelm any small clinic's sterilisation workflow. Here, the sterilisation process autoclave is fully integrated with hospital information management systems (HIMS) for instrument tracking from patient assignment through decontamination, sterilisation, and return to the operating room.
Microbiology and Research Laboratories
Laboratory autoclaves serve three main functions: sterilising incoming culture media and glassware, sterilising waste before disposal, and sterilising growth media and solutions to prevent contamination of experiments. Gravity displacement cycles at 121°C are standard for most laboratory applications. Many research institutions also use autoclaves to decontaminate biohazard waste — including cultures of pathogenic organisms — before bin disposal, a practice mandated by biosafety regulations in most countries. Laboratory autoclaves range from bench-top units of 6–25 litres to large front-loading models handling several hundred litres per cycle.
Tattoo and Body Piercing Studios
Professional tattooing and body piercing operations typically use small bench-top autoclaves to sterilise reusable jewellery, needle holders, forceps, and grips. Sterilization pouches and a sterilization pouch sealing machine are standard equipment in well-run studios, allowing instrument kits to be prepared in advance, sterilised, and stored until needed at point of service. Many jurisdictions require studios to maintain cycle records and biological indicator logs as a condition of their operating licence.
Pharmaceutical Manufacturing
Steam sterilisation — both in-place (SIP) and terminal sterilisation of aqueous products in sealed containers — plays a major role in pharmaceutical production. Terminal moist heat sterilisation of aqueous injections, infusion fluids, and ophthalmic preparations uses autoclave cycles with a minimum F0 value of 8 minutes (equivalent lethality to 121°C for 8 minutes), typically achieved using overkill or bioburden-based approaches as defined in the European Pharmacopoeia and USP. Packaging integrity and seal quality in this sector are governed by ISO 11607 with validations running to far greater rigor than clinical settings.
Sterilisation Process Monitoring: Physical, Chemical, and Biological Controls
No single monitoring method provides complete assurance that a sterilisation process autoclave cycle was successful. Best practice — and the requirement of most accreditation bodies — is to use all three types of monitoring simultaneously: physical, chemical, and biological. Together they form a layered verification system that catches different categories of failure.
Physical Monitors
Temperature sensors, pressure gauges, and cycle timers built into the autoclave itself. Modern machines produce a print record or digital log of every parameter throughout the cycle. Physical monitoring tells you what the machine did — but not whether steam penetrated to every point in the load. Physical monitors should be checked after every cycle.
Chemical Indicators (CI)
Process indicators (Class 1) are placed on the outside of every pack or pouch — typically printed onto the sterilization pouch itself or on autoclave tape — and change colour when exposed to steam. Multi-parameter indicators (Class 4/5/6) placed inside the pack react to the combination of temperature, steam, and time, confirming that sterilising conditions were met at the load surface where the indicator sits. Chemical indicators must be used on every pouch, every cycle.
Biological Indicators (BI)
Spore strips or self-contained BI vials containing Geobacillus stearothermophilus — the most heat-resistant organism used as a standard test species — are run through the cycle and then incubated. A negative result (no growth) after 24–48 hours at 56°C confirms that the cycle destroyed these resistant organisms, providing the highest level of confidence that sterilisation was achieved. The CDC recommends weekly BI testing as a minimum for clinical autoclaves; BI testing is required with every load containing implants.
In addition to these three monitoring types, pre-vacuum autoclaves should be tested at the start of each day with a Bowie-Dick (BD) test pack or equivalent air-removal test. The BD test is specifically designed to detect air leaks and inadequate air removal in pre-vacuum autoclaves — failures that physical monitoring alone will not detect. The BD test is not a sterilisation efficacy test, but it is an essential check of autoclave function before each day's use.
Common Sterilisation Process Autoclave Failures and How to Troubleshoot Them
Sterilisation failures in clinical and laboratory settings are more common than many practitioners assume. A UK National Health Service (NHS) review of sterile services complaints found that packaging and cycle monitoring failures — rather than autoclave mechanical defects — accounted for the majority of reportable incidents. Understanding the most common failure modes helps teams identify and correct process gaps proactively.
Wet Packs
Pouches or wrapped instrument sets emerge from the cycle visibly wet or with moisture droplets inside. This is one of the most common autoclave complaints. Wet packs represent a sterility breach because moisture creates pathways for microbial wicking through packaging material. Causes include: overloading the chamber, incorrect loading orientation, a malfunctioning drying phase, using packaging material incompatible with the cycle, or an autoclave with a faulty vacuum pump. Any wet pack must be considered non-sterile and reprocessed from the cleaning step.
Chemical Indicator Non-Change
A pouch exits the autoclave with its chemical indicator unchanged or only partially changed. This indicates the pack failed to reach the required sterilising conditions. Possible causes: instrument was placed in too large a pouch with excessive air space, pouches were stacked flat rather than on edge, or the autoclave cycle was aborted mid-run. All pouches from the failed load must be reprocessed.
Failed Biological Indicator
A positive BI result (growth after incubation) requires immediate investigation. First, the incubation process itself should be verified — an incorrectly incubated BI can give false positives. If the BI failure is confirmed, all loads processed since the last successful BI test must be retrieved, instruments reprocessed, and the autoclave taken out of service for engineering inspection. Root cause analysis must document the investigation and corrective actions taken.
Seal Failures on Sterilization Pouches
Pouches found with incomplete, delaminated, or peeled-open seals after autoclaving are a contamination risk. When using a sterilization pouch sealing machine, seal temperature setting too low, inadequate dwell time at the sealing bar, incorrect film thickness for the machine's calibration, or damaged sealing element surfaces are typical causes. A daily seal quality check — creating one test seal and performing a manual peel test — can catch equipment calibration drift before it affects patient care. Most sterilization pouch sealing machine manufacturers recommend temperature recalibration every 3–6 months or after a defined number of sealing cycles.
Instrument Corrosion and Pitting
Black staining, rust spots, or surface pitting on instruments after autoclaving points to several potential causes: use of tap water containing chlorine or minerals rather than distilled water, acidic detergent residue not properly rinsed off, dissimilar metals placed in contact during the cycle, or overloading that causes instruments to rub against each other. Corroded instruments damage faster, harbour biofilm, and lose mechanical precision — all requiring removal from service for assessment.
Maintaining the Autoclave and Sterilization Pouch Sealing Machine for Long-Term Reliability
Equipment maintenance is part of the sterilisation process. An unmaintained autoclave or a worn sterilization pouch sealing machine will eventually produce unreliable outcomes, often without visible warning signs until a monitoring failure occurs. Preventive maintenance schedules — rather than reactive repair — are the standard approach in accredited facilities.
Daily Autoclave Maintenance Tasks
- Drain and inspect the water reservoir; replenish with fresh distilled water only
- Wipe chamber door gasket with a damp, lint-free cloth; inspect for tears or deformation
- Clean the chamber interior to remove any mineral or organic residue
- Run Bowie-Dick test if using a pre-vacuum autoclave
- Check that door locking mechanism operates smoothly and the safety interlock functions
Weekly and Monthly Tasks
- Run biological indicator test (minimum weekly for clinical autoclaves)
- Descale the chamber and steam generator elements following manufacturer protocol (frequency depends on local water hardness)
- Inspect drain filter and clean or replace as needed — blocked drains cause wet packs
- Verify accuracy of temperature sensor against a calibrated reference thermometer (quarterly or per manufacturer schedule)
Sterilization Pouch Sealing Machine Maintenance
- Daily: clean the sealing element and Teflon-coated contact surfaces with a dry cloth; remove accumulated adhesive or film residue
- Weekly: inspect the sealing bar and silicone pad for signs of wear, blistering, or uneven contact surface
- Monthly or every 10,000 sealing cycles: recalibrate temperature setting against an independent thermocouple; replace sealing bar or silicone pad if worn
- Document all maintenance activities in the equipment log for audit and accreditation purposes
A well-maintained sterilization pouch sealing machine will typically produce a consistent, reliable seal across tens of thousands of cycles when operated within its design specifications and cleaned regularly. The sealing element is the highest-wear component and the most common cause of seal quality deterioration over time.
How to Select the Right Autoclave and Sterilization Pouch Sealing Machine for Your Setting
Purchasing decisions for sterilisation equipment should be driven by load characteristics, throughput volume, available space, and regulatory requirements — not cost alone. Selecting undersized or inappropriate equipment creates bottlenecks and workflow failures that outweigh any initial savings.
Autoclave Selection Criteria
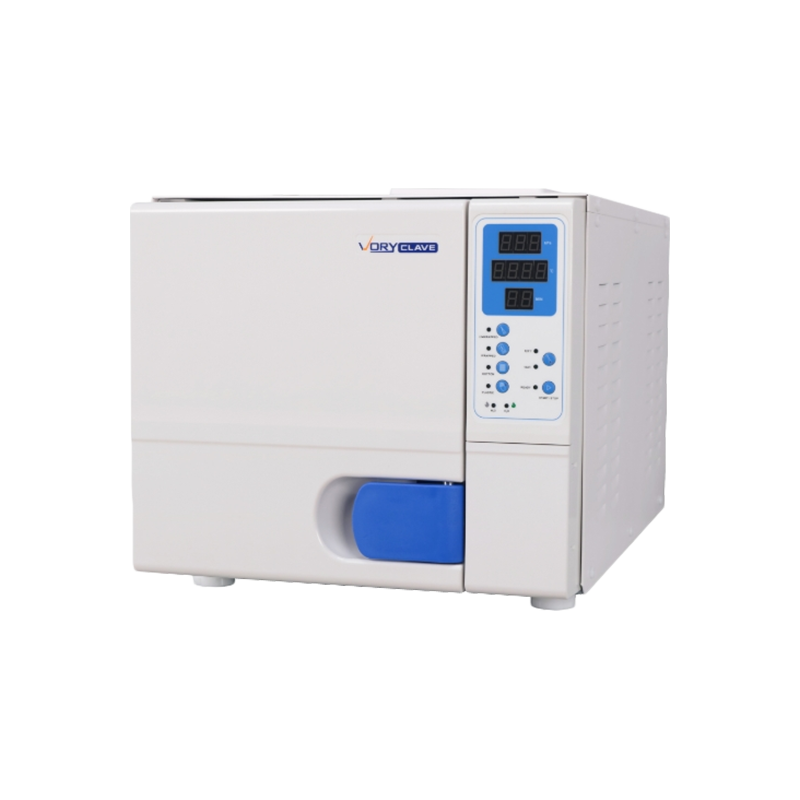
- Class type: Class N autoclaves handle only unwrapped solid instruments — not suitable for sterilization pouches. Class S is for specific defined loads. Class B handles all load types including wrapped packs and porous materials, making it the standard recommendation for dental and medical practices.
- Chamber volume: For a dental practice running 20–30 patients per day, a chamber of 17–23 litres is generally adequate. Oral surgery practices or those with high restorative volumes may require 30+ litre capacity or multiple autoclaves to avoid sterilisation bottlenecks.
- Cycle time: Faster cycles reduce workflow interruptions. Newer Class B autoclaves complete a full cycle including drying in 20–35 minutes. Compare total cycle time, not just dwell time, when evaluating models.
- Data output: Autoclaves used in accredited facilities must produce traceable cycle records. Look for USB, Bluetooth, or direct print output that logs temperature, pressure, and time with date and time stamps.
- Water consumption and supply: Some autoclaves use internal distilled water tanks; others require continuous supply. Internal tanks need daily refilling but allow flexible placement; plumbed-in models require installation but suit high-volume environments.
Sterilization Pouch Sealing Machine Selection Criteria
- Temperature range: Should cover the range required for your pouch material — most paper-film sterilization pouches seal optimally at 150°C–180°C. Machines with adjustable digital temperature display outperform analogue dial models for consistency.
- Seal width: ISO 11607-2 specifies a minimum seal width of 6 mm; most quality sterilization pouch sealing machines produce 8–12 mm seals. Wider seals provide a greater margin of safety.
- Throughput: For high-volume settings, a sealing machine with a rapid heat recovery between seals reduces workflow bottlenecks. Some models accommodate continuous sealing from reels of packaging material, bypassing the need for pre-formed pouches.
- Integrated indicator: Some sterilization pouch sealing machines embed a chemical indicator strip into the sealed edge during the sealing process — a convenient feature that provides a built-in process check on every sealed pack.
- Portability and footprint: Dental operatories have limited bench space. Compact sterilization pouch sealing machines with a footprint of under 30 cm width are available and suit single-room sterile preparation areas.
Frequently Asked Questions About the Sterilisation Process Autoclave
What is the minimum temperature for effective autoclave sterilisation?
The minimum validated temperature for steam sterilisation in healthcare settings is 121°C (250°F). At this temperature, most pathogens including Geobacillus stearothermophilus spores are destroyed within 15–20 minutes of exposure. Higher temperatures such as 134°C achieve the same result in 3–4 minutes, but require appropriate equipment capable of safely operating at higher pressures. Anything below 121°C is insufficient for steam sterilisation and falls below internationally recognised parameters. (Source: CDC Guideline for Disinfection and Sterilization in Healthcare Facilities.)
How long do sterile packages remain sterile after autoclaving?
Current international consensus, reflected in AAMI ST79 and CDC guidelines, is that sterility is event-related, not time-related. A properly sealed, undamaged sterilization pouch stored under appropriate conditions (clean, dry, temperature-stable, away from direct sunlight) remains sterile indefinitely until a compromising event occurs — such as a seal failure, physical damage to the packaging, or storage in a wet environment. Previous arbitrary expiry dates (30 days, 6 months, etc.) have been replaced by this event-related approach in most accreditation frameworks.
Can you autoclave instruments in any type of pouch?
No. Only sterilization pouches specifically designed and tested for steam sterilisation should be used in an autoclave sterilisation process. These pouches are constructed from validated combinations of medical-grade paper and plastic film that allow steam penetration while maintaining microbial barrier properties. Standard plastic bags, household zip-lock bags, or non-medical pouches will not perform appropriately — they can melt, seal poorly, or block steam penetration entirely, producing instruments that appear packaged but are not sterile. The packaging must meet ISO 11607-1 requirements.
What is the difference between a Class B and Class N autoclave?
Class N autoclaves are the simplest type — they use gravity displacement only and are suitable exclusively for unwrapped solid instruments without lumens or porous material. They cannot sterilise instruments wrapped in sterilization pouches because the gravity displacement method cannot remove all trapped air from packaging. Class B autoclaves use a pre-vacuum cycle with a vacuum pump, capable of handling all load types — wrapped packs, porous loads, hollow instruments, and solid unwrapped items. For any setting that packages instruments in sterilization pouches before autoclaving, a Class B autoclave is required. Class S autoclaves handle a defined subset of loads specified by the manufacturer, falling between Class N and Class B in capability.
How does a sterilization pouch sealing machine differ from a self-seal pouch?
Self-seal pouches use a pressure-sensitive adhesive strip that the operator presses closed by hand without any equipment. A sterilization pouch sealing machine uses a heated sealing bar that thermally welds the open end of the pouch shut, creating a bond in the packaging material itself rather than relying on adhesive. Heat-sealed closures generally produce a stronger, more consistent seal with lower risk of peel-back during autoclave cycles. For high-volume clinical use, a sterilization pouch sealing machine reduces the variability inherent in hand-pressed adhesive seals and provides a more auditable, consistent process. Both types of closure can meet ISO 11607-2 requirements when validated and used correctly.
Why must instruments be cleaned before autoclaving?
Steam cannot sterilise through organic matter. Blood, saliva, tissue, and other protein deposits create a physical barrier that prevents steam from reaching the underlying instrument surface. Additionally, organic soil absorbs heat and can insulate microbial cells against lethal temperatures. A study published in the Journal of Hospital Infection demonstrated that instruments artificially contaminated with blood-simulating soil and autoclaved without cleaning retained viable organisms after a standard 134°C, 4-minute cycle — cycles that successfully killed all organisms on clean instruments. Cleaning is not optional — it is the prerequisite for effective sterilisation.
 English
 عربى
عربى